 Sascha
Boss ES-5 Tips III: Building Patches
So, once your pedal board is built and your ES-5 global settings are made, it’s time to get familiar with creating ES-5 Patches. This article is meant to be read with your ES-5 pedal board by your side ... it’s much easier to understand things if you try doing them. Most of this article also applies to the ES-8: Though there are some differences (more loops, 2 mixers, stereo functionality, more Patch MIDIs, more Assigns, expression outputs available ...), most basics are the same.
Table of Contents
Editing an ES-5 Patch
As discussed in the previous article, all Patch-related settings can be made in the two ES-5 menus “Patch” and “CTL/EXP”, which you reach by pressing EDIT and then navigating through the menues with ◄ and ►.
“Patch” is mostly about defining what the Patch will do when activated. “CTL/EXP” is mostly about stuff that you can do once you are in that Patch. Both will be covered in detail in this article.
You save a Patch by pressing WRITE three times. After the first press, you can select to which Patch location (111 to 855) you want to save that Patch. So, you can easily start from one Patch, modify it, then save the modified version to another Patch location. After the second press, you can edit the Patch name, and the third press will finalise saving.
Unfortunately, the ES-5 will not show you the name of the destination Patch which you are about to overwrite. So, if you start from a template Patch to modify it and store the new version elsewhere, you may first wanna make sure that your destination Patch location is ready to be wiped.
Defining your Signal Path with the “Patch” Menu
Now, let’s start with the “Patch” menu. This will let you define three things for the current ES-5 Patch:
- The signal path: Which loops and buffers/mixers are active, and in which order will your input signal run through them?
- The TRS control outputs: To which state will they switch your amp (or whatever you connect to them) when this Patch is activated? Here, and only here, you can also tell any of the control outs to send tap tempo pulses in the speed of the current ES-5 master clock tempo (in quarters or subdivisions), or in a tempo that you specify manually.
- MIDI settings: What presets will be recalled on connected MIDI devices once this Patch is activated? Which additional CC data will be sent to them? Also, will the ES-5 send MIDI clock, and at what tempo?
Side note: The first three pages of this menu (Loop On/Off, Loop Structure, and TRS Switching) are always available by cycling through display views with the DISPLAY/EXIT button; which can be a convenient shortcut, and which allows quick comparisons of the settings made here between different Patches.
We will get to MIDI later. Let’s start with the signal path. Menu Page “Loop On/Off” lets you see and switch the on/off state of each of the 5 ES-5 loops. Normally, when in Edit Mode, the number footswitches and their LEDs will do the same job; but they may be assigned to doing other stuff, so the “Loop On/Off” page is the most reliable place to really see which loop is active.
Now, the actual signal path is set on the Menu Page “Loop Structure”, in conjunction with the Pages “Input Buffer” and “Mixer”.
Loop Structure
“Loop Structure” lets you set the order of your 5 loops. You can do some quite complex things on this Menu Page; check page 8 of the manual and section 3 of the Boss Australia guide for reference.
Default order is:
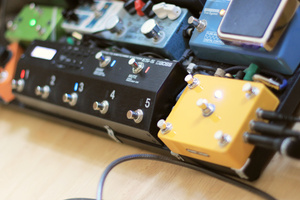
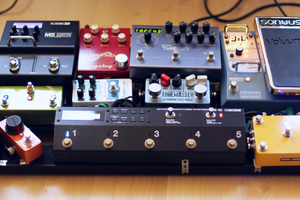
Input → Loop #1 → Loop #2 → Loop #3 → Loop #4 → Loop #5 → Output; or as the ES-5 display shows it: O-5-4-3-2-1-I. Yep, the display follows the “right to left” convention just like most effect pedals and pedal boards. So does the order of jacks on the ES-5 backside. Alas, the ES-5 number footswitches don’t; they go 1 to 5 from left to right. So, I found that for my brain, it’s less confusing to use O-1-2-3-4-5-I as my default configuration; that is, Loop #5 contains my ProStage Remote Wah which is typically the first pedal in my signal chain, and Loop #1 contains my Timeline which is typically the last. And I set up my template Patches to have the structure O-1-2-3-4-5-I, and build most of my Patches starting from there (for some Patches however, I re-order my pedals; like, sometimes I want my M5 pre, sometimes post dirt section).
The “Loop Structure” menu page also allows you to set up carryover for one of the loops, or alternatively parallel paths. We will get to that later.
Input Buffer
The ES-5 Input Buffer is always placed between the Input jack and the loop that you position right after the input. Switch it on and off in the menu and listen to the difference it makes on your sound; trust your ears and decide whether you need it or not. Some dirt pedals, especially old school fuzz pedals, don’t work well with a buffer in front of them. If you want to use one of those, you have the options to either put that fuzz before the ES-5 Input, or to switch the input buffer off on any Patch that uses the fuzz. Me, I don’t like the effect that the input buffer has on my sound; also, I already have two pedals on my board with high quality buffers that are almost always on, the Sonuus Voluum and the Strymon Timeline. So, I keep the ES-5 input buffer off most of the time, and use it only when I need 1980s style ultra-clean sounds.
The ES-5 Mixer
The ES-5 has one so-called Mixer (ES-8 has two). This mixer is normally placed right before the main output jack. When you activate it on the “Mixer” menu page, it will serve as output buffer. Also, you can use it as a volume boost/cut that can be programmed in 3 dB steps from -12 dB to +6 dB. This is great e.g. for making your solo sounds come out louder (at least if the ES-5 output goes into a kinda clean amp or directly into a power amp, like if it is connected to the return of a serial amp FX loop).
However, if you are using Parallel Paths or Carryover on a Patch, the Mixer will be needed there; since there is only ONE Mixer, you cannot have parallel paths and carryover on the same Patch.
You cannot manually move the mixer; it will always be either right before the output, or, if parallel paths or carryover is active, right behind the loop(s) with that function. So, if you e.g. have your overdrive pedal in ES loop #3, and you want to use the mixer before that loop to give the overdrive more or less gain, you only have the two options to either a put loop with any pedal in a parallel path, or a loop with any pedal on carryover before loop #3. If you use carryover, the carryover loop needs to be bypassed (only then the mixer will affect your volume). If you use a parallel path, the loop can be either way, on or off ... mixer will always work. Still, it may be tricky to find a pedal that you really want to be active and in a parallel loop in front of your drive in this scenario.
Parallel Paths
Now, what is parallel paths anyway? The ES-5 allows you to split your signal chain into two parallel chains at any point; and merge them again at any other later point. You do this by, on the Loop Structure page, moving the cursor to the point where you want to have the merge point (either between two loops or right before the output) and pressing enter; then selecting loops with the ◄ and ► buttons and moving them around with the + and - buttons. So, you could go to an extreme and put all 5 loops in parallel chains; like, you could have a heavy distortion going into a delay in parallel to a clean sound with compressor, chorus and reverb.
Parallel paths is a very powerful function, that you can also use to:
- Add an analog dry path to digital pedals that don’t have one, such as Eventide H9, Source Audio Nemesis, Empress Superdelay or anything by Line6 – in that case, those pedals should be set to “kill dry” mode; or if they don’t have that, their mix parameter needs to be set to 100% wet (otherwise you will get nasty phase cancellations from mixing the analog dry path with the dry portion of the digital signal, which will always be slightly delayed due to latency).
- Blend dirt pedals with a clean signal.
- Mix in the original signal to any pitch effect.
- Convert any pitch vibrato into a chorus.
- Build a stereo setup and send different effects to each amp (in this case, in one of the two parallel chains, the final pedal’s output jack needs to be disconnected from the ES-5 loop return and get connected to the second amp instead)
However, there’s a limitation: The ES-5 mixer will always be placed right after the merge point. That is, the ES-5 cannot individually control the volume of any of the two parallel paths. So, if you use the parallel paths to add an analog dry path to e.g. a Line 6 M5 (that doesn’t have a “kill dry” mode), you will have the M5 delays / reverbs at full level; and you may have to put some volume-reducing pedal behind the M5 inside its parallel path to get the delay/verb sounds you want.
Carryover
To set an ES loop to carryover, go to the Loop Structure page, select one loop with the ◄ and ► buttons, press enter – the loop number will be displayed inverted, and you will be set. Remember that you can only have carryover on one loop OR parallel paths within one ES-5 Patch. Carryover basically means than switching a loop off will only disconnect the send, but not the return of that loop.
So, what can the ES-5 carryover function do for you?
- You can get trails for any delay/reverb pedal, including those without built-in trails bypass functionality. Like, you could put an old analog delay in one ES-5 loop, set that loop to carryover, then switch it off using Manual Mode – and you will hear the delay trail off.
- Also, you could use momentary Assigns to only send specific notes into your delay while you hold a certain ES-5 footswitch, then release that footswitch and have the delay trail off.
- You can get trails between ES-5 patches. Like, you have your lead sound on Patch 215, and after your solo, you want to switch back to Patch 214, but have your solo delay trail off.
- Taking this concept further, you could have a delay pedal active on your lead Patch 215, and a reverb pedal active on your rhythm Patch 214, and get trails when switching either way (setting for this would be: Patch 214 has reverb loop on – delay loop off + carryover; Patch 215 has delay loop on – reverb loop off + carryover. If you are a perfectionist, put the delay last in your signal chain on Patch 214, and the reverb last in your signal chain on Patch 215, to avoid sound changes by running the reverb trails through the delay, or vice versa).
- Easter egg functionality: You could use Carryover to alternate between some pedal and a volume boost or cut within one Patch. As explained above, in Patches with carryover, the mixer volume will only become active when the loop with carryover will be off. So, imagine that in loop #1 of your ES-5, you have a great wah which boosts your signal by about 3 dB when active. You could now set loop #1 to carryover, and the ES-5 mixer to +3 dB. Now, when you turn off loop #1 in this Patch, the +3 dB boost will kick in; effectively balancing out the gain difference between wah on vs. wah off. Downsides of this method include that you can only adjust the mixer in 3 dB steps (which is not finetuning-friendly), that you will still hear the wah’s noise floor when its loop is bypasses (since carryover means: only the send is switched off, return stays active), and that you can’t compensate the pedal to unity gain, but only can compensate the pedal-in-bypass to deviate from unity gain in the same direction as the active pedal does.
Another use of this functionality could be using the ES-5 mixer as switchable boost within a Patch: The mixer level cannot be target of assigns, thus normally, you can only use it to boost a whole Patch, but not as switchable boost within that Patch. Enter the easter egg: If you have a loop containing a pedal that A. you don’t need for the current Patch, and that B. can be remote-bypassed from your ES-5 (either via MIDI or via the CTL Outs), you could remote-bypass that pedal, set its loop to carryover, set mixer level to +3dB or +6dB, and voilà switchable boost. At whatever position in the signal chain you will put that loop. Switchable either in manual mode, or by assigning some footswitch to switch that loop on/off.
To make your non-MIDI delay/verb pedal trail on when changing ES-5 Patches, the settings of the target Patch matter: There, the loop containing that pedal verb should be switched off, and in carryover mode. The Patch from which you start doesn’t need carryover.
When the delay/verb is a MIDI pedal controlled by the ES-5, there’s two additional things to consider:
- MIDI messages sent by the ES-5 on patch change may stop a MIDI delay/verb from trailing. Especially, changing the delay/verb’s preset with a Program Change (PC) message will mostly kill any trails immediately (unless you have a pedal with dual engines, like a RV-500, Ventris or Empress Echosystem). So, if you want trails between two Patches, it often makes sense to have both Patches send the same PC commands; this works e. g. on the Timeline. On a M5, ANY PC will kill the trails, even the PC for the current preset. So there, you can only get trails if the target Patch is not sending any PC on the M5’s MIDI channel.
- In case you have pedals that can be put in bypass with trails via MIDI (such as a Strymon Timeline, with “Persist” parameter set to ON), keeping that loop switched ON and bypassing the pedal via MIDI has mostly the same effect as setting the ES-5 loop to carryover and switching it OFF; only that you will not use up your ES-5 mixer.
Final note: If you want the trails to sound unaltered when changing ES-5 Patches, the Target Patch needs to send the trails through exactly the same pedals (in case of MIDI pedals: on the same presets/settings) as the original Patch. Or, easier: Put the loop producing the trails last in your signal chain.
Making MIDI Settings in the “Patch” Menu
So, after going through the signal-path-related functionality of the ES-5, it’s time to look at MIDI settings that can be made within an ES-5 Patch. While there is additional MIDI functionality to be found in the CTL/EXP menu (covered below), the core MIDI settings of a Patch are made in the ES-5’s Patch MIDIs (PMIDIs).
Patch MIDI Basics
Each ES-5 Patch has 8 so-called Patch MIDIs, short form PMIDI. You reach them by pressing EDIT, navigating (with ◄ and ►) to “Patch”, pressing ENTER, then navigating quite far to the right (►). You can think of a PMIDI as a bundle of MIDI commands sent on one MIDI channel. A typical use of a PMIDI would be to define: “In this ES-5 Patch, I want my delay pedal to be on Preset 153”.
Here’s the setting you can make in each of the 8 PMIDIS:
- MIDI Channel (Ch):
The MIDI channel this PMIDI will be sending on. Setting Ch to OFF will deactivate this PMIDI.
As discussed in the previous article, you should give each MIDI pedal on your board its own MIDI channel (there are 16 of them; should be enough). Normally, you will have at least one PMIDI for each of your MIDI pedals in an ES-5 Patch. - Bank Select (LSB and MSB):
The MIDI standard specifies 128 presets that you can reach with Program Change commands. Yet, many devices have more presets; like, your typical Strymon big box pedal will have 200 to 300 presets. To reach them, MIDI provides bank select commands. Read more about them below. - Program Change (PC):
This will typically switch all MIDI pedals receiving on this PMIDI’s channel to a certain preset. Sending PC=26 will switch many pedals to preset #26. Some pedals count differently, starting with 0 rather than with 1; for them, PC=26 would result in preset #25. Some have less than 128 presets; like, for a M5 with its 24 presets, sending PC=26 (or any other number higher than 24) will have no effect at all. Some pedals allow PC mapping; there, it completely depends on the pedal’s PC map to which preset PC=25 will take you. - Continuos Controllers (CC)
With CC commands (“Continuos Controller”, or “Control Change”), you can control individual parameters on MIDI devices. A MIDI device can react to up to 128 different CCs (#0 to #127), each one allowing values from 0 to 127. Like, a Strymon Timeline will react to 59 different CCs; e.g. CC #18 will set modulation depth, CC #102 with value=0 will put the Timeline in bypass, value=127 will engage it again. Check the MIDI implementation chart of your MIDI pedals to find out which parameters you can control with which CCs (some pedals even allow custom mapping of CCs).
The ES-5 can send 2 CC commands in each PMIDI. So, you could use one PMIDI to tell your Strymon Timeline: “Go to my preferred Tape Delay preset, but replace the mix and repeats parameters stored in that preset with CC #14=2 (very low mix) and CC #9=120 (loads of repeats)!” - Transmit
Starting from ES-5 firmware v2.0, you can define whether or not a PMIDI will be automatically triggered when its “Mother Patch” is activated. Setting Transmit to MANUAL will result in a “sleeping” Patch MIDI, that does nothing until you trigger it with an Assign. Read more about this below.
MIDI Bank Select LSB and MSB
Let’s come back to Bank Select LSB and MSB for a moment. Actually, LSB means “Least Significant Byte”, while MSB is the “Most Significant Byte”; in theory, they could be combined to select 128 × 128 = 16384 different banks, with 128 presets each. In real life, no pedal I know of has that many presets. Most pedals that do have more than 128 presets just use either the MSB or the LSB parameter to switch banks. Like, Strymon big boxes use MSB only; and only values below 3. Sonuus Voluum uses LSB only.
Now, MIDI fun fact: MSB and LSB are actually specific CC controllers – MSB is CC #0 and LSB is CC #32. This is defined in the MIDI convention. Strymon doesn’t care and uses CC #32 for other parameters (Bloom length on the BigSky, Vintage Trem Pan on the Mobius, Dual Delay Time 2 on the Timeline, Head 4 Pan on the Volante). It took me headaches to figure out why the Timeline DUAL mode, which previously worked perfectly, would always have messed-up delay times when controlled from my ES-5; until I found out the LSB value transmitted from the ES-5 was to blame (or, rather, Strymon’s developers for misusing CC #32 in the first place).
This means: You should always set LSB to OFF on PMIDIs transmitting on any Strymon pedal’s channel. That is, unless you deliberately want to creatively re-use LSB to send those specific parameter CCs.
This also means: If you have a MIDI pedal that allows free mapping of CC controllers, you could use the LSB and MSB settings in each PMIDI to send two additional CC commands to that pedal.
Strymon Presets Translated to ES-5 MIDI
BTW, if you play Strymon big boxes, and you want a formula “which Program Change command do I need to send from my ES-5 to get to a certain preset” – search no longer:
- Timeline and Mobius, Bank 0 to 63:
LSB=OFF; MSB=0; PC=Strymon Bank number × 2, +1 for A | +2 for B - Timeline and Mobius, Bank 64 to 99:
LSB=OFF; MSB=1; PC=(Strymon Bank number-63) × 2, +1 for A | +2 for B - Big Sky, Preset 00A to 42B:
LSB=OFF; MSB=0; PC=Strymon Bank number × 3, +1 for A | +2 for B | +3 for C - Big Sky, Preset 42C to 85A:
LSB=OFF; MSB=1; PC=(Strymon Bank number-42) × 3, -1 for A | +0 for B | +1 for C - Big Sky, Preset 85B to 99C:
LSB=OFF; MSB=2; PC=(Strymon Bank number-85) × 3, +0 for A | +1 for B | +2 for C - Volante, Preset 0 to 127:
LSB=OFF; MSB=0; PC=Strymon Preset +1 - Volante, Preset 128 to 255:
LSB=OFF; MSB=1; PC=Strymon Preset -127 - Volante, Preset 256 to 299:
LSB=OFF; MSB=2; PC=Strymon Preset -255
/end of excursion.
MIDI and Control: The CTL/EXP Menu
The CTL/EXP menu allows you to fine tune what the footswitches on your ES-5, as well as external controllers you may have hooked up to your ES-5, will do in a specific Patch. Some of this is related to the global settings discussed in the previous article; still, there’s quite some settings that should be available globally IMHO, but aren’t. Like, you can unassign mute functionality from the MUTE footswitch globally; but there’s no global setting “now, globally make the MUTE footswitch send a certain MIDI CC command activating a volume boost on one of my pedals”; you can only program this per Patch in the CTL/EXP menu, and make this “quasi global” by building all your Patches based on a template Patch with this setting.
You get to the CTL/EXP Menu by pressing EDIT, navigating through the menues with ◄ and ► and then pressing ENTER. You will find that this menu contains two different types of settings:
- There’s the basic control settings pages: Dedicated menu pages for each of the seven ES-5 footswitches. Also, for the two external footswitches and for the expression pedal you may connect to your ES-5. Very limited options here.
- There’s 8 so-called Assigns. This is where the fun and the freedom starts: Assigns give you a wide range of options to program and customize your ES-5.
Let’s look at both in detail.
Dedicated Pages for each ES-5 Footswitch
The 10 dedicated CTL/EXP menu pages will allow you to define the basic function for each of the 7 internal and the optional 2 external footswitches. Also, kind of a weird bonus, you can activate one special function – master clock BPM control – for the optional expression pedal here. Everything that you set on these 10 pages may either affect only the current Patch, or may be a global setting ... depending on settings you have made in the global Preference menu. Everytime you see (SYS) in the lower left corner of the display, the settings you make will be global.
Back to the footswitches: Each of the 7 on-board footswitches has its default function. Like, switches #1 to #5 will switch Patches in Memory Mode, and loops in Manual and Edit Mode. BANK will change Banks (or will put the ES-5 in Bank select state, depending on the current Patch Select Mode); holding in for 2 seconds will change between Memory and Manual Mode. MUTE will mute the ES-5 (that is: the output, and all loop sends), holding it for 2 seconds will put the ES-5 in bypass.
Now, these default functions are not hardwired. On the dedicated CTL/EXP menu page of any footswitch, you can change the basic function of that footswitch for that Patch (or globally, depending on settings you made in the Preference menu). With one exception: Changing the basic function of any of the 5 number switches will only have an effect in Memory Mode. Once you enter Manual Mode, each footswitch is back to switching the loop with the corresponding number – unless you change this in the global settings.
There’s the exact same 20 options available for the basic function (“Func”) of each of the internal and external footswitches (also to be found on page 10 of the manual):
- Off: Footswitch will have no basic function. You can still use this footswitch to trigger assigns.
- MemM: Footswitch will toggle between Memory Mode and Manual Mode. This can be very handy if you use Manual Mode a lot, and the “hold BANK for 2 seconds to change modes” is too slow for you.
- Mute: Footswitch will do what, by default, the MUTE footswitch does (including bypassing the ES-5 when holding for 2 seconds).
- BnkM: Footswitch will do what, by default, the BANK footswitch does (including switching between Memory and Manual mode when holding for 2 seconds).
- GrpD/GrpU: Direct Switching Up/Down of Groups.
- BnkD/BnkU: Direct Switching Up/Down of Banks – this only works properly if you set “Patch Select Mode” to 1 in the global settings (“Play Option” menu).
- MemD and MemU: Direct Switching Up/Down of Patches. You can even hold to scroll.
- Num1 - Num5: Footswitch will do what, by default, the corresponding number footswitch will do in Memory Mode.
- Ctl1 - Ctl4: Footswitch will control the corresponding TRS switching outputs. For this, you can also define if it will switch momentarily (MOM) or latching (TGL = toggle between ON and OFF). Also, you can define which way the ES-5 will send ON and OFF: Like, if CTL Out 1 switches your amp’s tremolo, you could set MUTE to Func=Ctl1, Min=OFF, Max=ON and Mod=MOM to get momentary tremolo when holding down MUTE. Now, setting Min=ON and Max=OFF would result in permanent tremolo, only interrupted while you hold down MUTE.
- BPM: Footswitch will be a tap tempo switch controlling the ES-5 master clock (and the tempo of all pedals synced to the ES-5 clock).
Note that many of these functions (BnkM, GrpD, GrpU, BnkD, BnkU, MemD, MemU, Num1-5) are not available as targets for Assigns. So, if you want these functions in your Patch, you need to make them the basic function of some footswitch here. And, while the other functions – MemM, Ctl1-4, BPM, and Mute (without the Bypass-on-hold extra function) – are available as targets for Assigns: If you want them in your Patch anyway, better set them here, keeping your 8 Assigns free for other stuff.
Here’s some examples what you could do with these basic-functions-for-footswitches settings:
- If you don’t need the ES-5 mute function, you could set your MUTE footswitch to Func=OFF. I did this globally, since I rather want to use MUTE as a flexible extra control button for Assigns (on most Patches, it will send a CC message to one of my MIDI pedals, resulting in a gain boost).
- Similarly, you could globally set BANK to have Func=BnkD, and MUTE to Func=BnkM. With Patch Slct Mod=MODE1 in the Play Options menu, this would give you on-board switches for Bank Down and Bank Up, still having access to Manual Mode (now by holding MUTE for 2 seconds).
- You could set footswitch #5 globally to Ctl1|OFF|ON|TGL. This way, you would lose direct access to the #5 Patch in each Bank; but on the upside, you would always (at least in Memory Mode) have direct access to switch Ctl1. Perfect in case Ctl1 controls channel switching on your amp, and to you, spontaneous access to this function is worth sacrificing access to 20% of the available Patches.
- Extreme example: You could radically restructure your access to the 200 ES-5 Patches. Globally set number switches #1/#2 to Patch Down/Up; #3/BANK to Bank Down/Up; and finally #4/#5 to Group Down/Up. Set your Play Options to Bank Chg Mode=Immediate and Patch Slct Mod=MODE1.
Now, in Memory Mode, you can directly switch Groups, Banks and Patches up and down from every Patch. This will be confusing at first: If you are on Patch 113 and press #2, it will take you to 114 (one Patch up) rather then to 112. But if you re-label your Footswitches accordingly, it could be a fast way to get to each of the 200 Patches without using external footswitches.
However, the whole ES-5 concept is build around the 5 Patches per Bank, 5 loops, and the 5 number switches assigned to those; if you re-assign the number footswitches to do other stuff than #1=Num1 etc, it’s a bit like leaving your path when wandering through Mirkwood: Things can get very confusing, and you may get lost. So my advice would be: Don’t mess with the basic functions of the number footswitches; leave them at Num1 to Num5, in the correct order. If you want to get more control, connect an external dual footswitch, and check my tips for a more efficient use of the BANK and MUTE footswitches.
Assigns: A Powerful Tool
If you have ever worked with complex synthesizers, you may be familiar with the concept of a modulation matrix: It lets you route several modulation sources (control signals) to various destinations to be controlled. Assigns on the ES-5 are a very similar concept: You have 8 Assigns that you can use to control lots of stuff. Note than an Assign can only control one function; so, if you want to use your MUTE footswitch to toggle between rhythm and lead sound, with lead having the loop with your boost pedal switched on and the delay mix increased via MIDI CC and the MUTE LED on the ES-5 switched on, you will need 3 Assigns.
To get to Assigns, press EDIT, navigate to the the CTL/EXP Menu with ◄ and ►, press ENTER, then navigate right ► to Assigns 1 to 8. Available sources and targets are listed on pages 10 and 11 of the manual; only Patch MIDI as target is missing there, since it was added in a later firmware revision.
Here’s all sources that can trigger/control an ES-5 Assign:
- External footswitches connected to the ES-5 CTL In jack (CTL1 and CTL2)
- Each of the 7 on-board footswitches (BANK, MUTE, #1 to #5)
- CNUM, that is: The Num footswitch of the currently selected Patch; explained in detail below.
- An external expression pedal connected to the ES-5 CTL In (EXP)
- Internal control signal generators, called “virtual expression pedals” by Boss: There’s a ramp generator (INT – “internal pedal”) and a LFO (WAV – “wave pedal”); explained in detail below.
- Any MIDI CC command from #0 to #127, incoming on the ES-5’s MIDI receive channel (as defined in the global settings).
As you see, this includes almost every possible control source that the ES-5 has to offer. The only three limitations that I see would be that no other MIDI command types except for CC are available; that you cannot assign stuff to footswitch hold, like “I want to toggle between A and B when kicking a footswitch quickly; but between C and D, when I hold the footswitch down for X seconds”; and that the 5 number footswitches cannot trigger Assigns when the ES-5 is in Manual Mode.
Settings which you can make in an Assign include:
- Sw: Switches the Assign ON or OFF. Useful to make sure Assigns that you don’t need won’t cause any unexpected mess.
- Src: Selects one of the sources listed above.
- Mod (only available when the source is an internal or external footswitch): Selects either momentary (MOM) or latching (TGL = toggle) operation.
- Cate and Target: Selects the category of the target to be controlled by this Assign, and the actual target within this category (see list below).
When Cate=MIDI, there will be Ch for MIDI Channel and CC# parameters instead of “Target”.
When Cate=PMIDI, there will be Num instead of “Target”. - Min and Max: Sets the minimum and maximum values sent by this Assign. Depending on the target, you will get different options here; mostly OFF and ON, or values from 0 to 127.
- Act L and Act H: Still trying to figure these ones out. Seems like I don’t need them; everything is fine when I leave Act L at 0 and Act H at 127. Maybe something that you may need when working with an expression pedal?
- When Src=INT or Src=WAV, you will get an additional page with parameters; explained below.
Finally, here’s all targets that can be controlled with Assigns:
- Cate=LOOP: Any of the 5 loops (L1 to L5) can be controlled to be ON or OFF. This can come in handy when you want to be able to spontaneously control a certain loop without having to enter Manual Mode.
- Cate=E.CTL: Any of the 4 external switching functions (CTL1 to CTL4) can be controlled to be ON or OFF. Note that the additional options to send tap tempo pulses in the ES-5’s master clock tempo are not available here; you can only get them in the Patch settings.
- Cate=MODE: Three general functions of the ES-5 can be controlled here – Mute, Bypass (Byps) and switching between Memory and Manual Mode (MemM). Other than on the dedicated pages for each footswitch, in Assigns, “Mute” will not include the “hold 2 seconds to go to bypass” functionality. Also, note that while you can assign some number footswitch to take you to Manual Mode, it will not take you out again, since Assigns to number footswitches don’t work in Manual Mode.
- Cate=MIDI: Here, you can send any CC# on any MIDI channel, with any Min and Max values. This is great to control all kind of stuff on your MIDI effect pedals; like, hold down current number footswitch (CNUM) to get infinite repeats etc.
- Cate=BPM: This lets you control the ES-5 master clock tempo; either by switching between concrete values (MstBPM), which I never use; or by using tap tempo (Tap). Now, you can convert any internal or external footswitch to a tap tempo switch on the dedicated pages for that footswitch already, that is: you don’t need an Assign for this. But an Assign with Cate=BPM and Target=Tap does make sense if you either want to use CNUM to control tap tempo, or if you want tap tempo as a secondary function on the BANK footswitch in Patch Select Mode 2.
- Cate=LED: This lets you switch on/off any of the 7 LEDs next to the ES-5 footswitches. The LEDs will always be red (not blue) when switched like this. Note that if you program your Patch to have an Assign to its own number LED, then that LED will remain dark by default. Like, when you are on Patch 552, normally the #2 LED will be lit in blue; but no longer when you create an Assign with Cate=LED and Target=Num2.
- Cate=Pat.M (firmware v2.00 or newer required): Here, you can trigger any of the 8 Patch MIDIs defined in the Patch settings; read more below.
As you can see, while almost all possible control sources are available for Assigns, the list of possible targets is kinda limited: Some things, like the ES-5 signal path/order of loops, or the ES-5 mixer level, cannot be controlled live at all (unless you want to delve into menus with the small buttons), but can only be programmed per patch. Some general functions are only available on the dedicated pages of each footswitch, but not as target for Assigns; this includes Patch up/down, Bank up/down and Group up/down – also meaning: You cannot trigger those functions from an external MIDI controller. One very important target, switching MIDI program changes on your MIDI pedals, is only available indirectly, via Patch MIDI (Cate=Pat.M); let’s check how this works ...
Assigns and Patch MIDI
So you want to switch between two different presets on your MIDI-fied effect pedal within the same ES-5 Patch? Possible with Patch MIDI and assigns, provided that you have firmware 2.0 or newer installed.
Like, you could program a Patch with two Patch MIDIs sending on the MIDI channel of your delay pedal. You program Patch MIDI 1 to Transmit=AUTO, and to set the delay pedal to a short slapback delay. Patch MIDI 2 will be Transmit=MANUAL, and set the delay pedal to a reverb-ish pattern delay.
Now, whenever you activate this Patch, your delay pedal will be on slapback. But you could program an Assign to make the current number footswitch send the delay pedal to pattern delay: Sw=ON, Src=CNUM, Mod=MOM, Cate=Pat.M, Target=PMIDI2, Max=ON (it doesn’t matter what MIN is set to).
Downside is that you cannot make one footswitch toggle between two different Patch MIDIs, at least not in the current firmware (2.01). So, to get back to your slapback delay in this scenario, you would need to assign a second footswitch to send PMIDI1 again; or you would have to leave the Patch and then go back to it. I’ve demonstrated that in this video ... fast, huh? (Did you know Youtube has a playback speed setting?)
Bottom line: Assigns targetting PMIDIs currently are the only method to send Program Change commands within an ES-5 Patch.
CNUM, and how to use it
The ES-5 has only 7 internal + 2 optional external footswitches. So, unless you have an additional MIDI controller hooked up to your ES-5, there’s not many possible sources to trigger Assigns. To make things worse: The 5 number footswitches are not really useful either; when you hit them, they will take you to another Patch, which is normally not what you will want (Assigns are for flexible control within a Patch). Unassigning patch-changing functionality from some number footswitches is an option, but it will make it difficult to reach certain Patches, so we advice against it (unless you consciously decide to, say, sacrifice all Patches with final digit 5; freeing up footswitch #5 to trigger your Assigns).
This leaves only the BANK, MUTE and optional external footswitches as sources for Assigns; not much, especially since you might need BANK and MUTE for their regular function.
But ... there is still one other option available: The number footswitch of your current Patch. You don’t need that one to switch Patches, so it’s free for all kinds of fun. So, on Patch 423, you could program Num3 as source for an Assign. Or alternatively, you could use CNUM – this means “The Num footswitch of the currently active Patch” – as source. In both cases, when you are on Patch 423, hitting footswitch #3 would trigger the Assign (unless footswitch #3 is unassigned from its default functionality, which would be: Func=Num3).
So, what are the differences between using CNUM and using the actual number Num3 as trigger for an Assign in Patch 423? There’s two of them:
- Num3 would already trigger the Assign at the very moment that you select Patch 423. CNUM on the other hand will only trigger after the Patch is active. Since you would typically use Assigns to introduce changes within a Patch, CNUM normally is the better choice.
- Also, when you copy a Patch to a different location, CNUM will always keep the functionality „hit the Patch’s footswitch for a second time to trigger the Assign“; while absolute trigger source Num3 will no longer do this once the Patch is saved to a Patch location with a final digit other than 3.
There’s only very few scenarios I can think of where you would rather use the actual number footswitch rather than CNUM as source for an Assign; they include:
- You can create a Mute Patch by assigning the Patch’s number footswitch to Cate=MODE and Target=Mute. This way, recalling the Patch will instantly mute the ES-5 (while CNUM would only mute it at the second kick). This can come in handy when you want to free the MUTE footswitch for other functionalities by creating Mute Patches instead.
- In this video, my aim was to play the original two-part harmonies of The Beatles’ “And Your Bird Can Sing”. Lots of different intervals needed; I found a way to make it work with three different “Smart Harmony” presets on my M5, switched with the ES-5. On Patches 421 and 422, CNUM is assigned to momentarily switch the M5 to another interval via MIDI expression. On Patch 423 however, I needed the option to enter the preset with two different intervals – which became possible by assigning Num3 (rather than CNUM) to momentarily switch the interval on the M5 from 5th to 6th: When I would go from Patch 422 to 423 with a very short kick, it would be on the 5th; when I would do the same holding down the #3 footswitch, I wound enter the Patch on the 6th, and get to the 5th by releasing the #3 footswitch.
INT and WAV: The ES-5 Ramp Generators and LFOs
There may be situations where you don’t just want to toggle your MIDI pedal between two CC values, but rather make the value automatically rise, or fall, from A to B in a certain time. Or cycle between A and B periodically. For this, the ES-5 offers built-in ramp generators (INT) and Low Frequency Oscillators (LFOs, called WAV or virtual wave pedal by Boss).
Here’s some possible use cases:
- With the ramp generator INT, you can make any modulation effect, whose speed can be controlled via MIDI CC, ramp up and down in speed like a Leslie rotary speaker does (demonstrated here with the M5 Panned Phaser model that normally doesn’t have a ramping function).
- Also, using INT with a MIDI pitch effect, you can create whammy-like effects without using an expression pedal (as I demonstrate in this video); and auto-pitch effects like the Boss PS-5/PS-6 one famously used by The Black Keys on “Lonely Boy” (demonstrated here).
- With the LFO called WAV, you can add modulation to any MIDI pedal that allows parameter control via CC commands. Like, you could convert any MIDI pedal with a CC controllable output level to a tremolo pedal, in sync with the ES-5 Master Clock. Or, you could turn the Whammy model (“Pitch Glide”) on a Line 6 M5/M9/M13 into a police siren. With some pedals however, you may get crackling noises (like, when you try to turn the MIDI controllable analog boost of the Strymon Timeline into a Tremolo), or “steppy” curves, depending on how they handle incoming CC.
Each Assign can programmed to INT or WAV, so in theory, you could have up to 8 LFOs or 8 ramp generators sending MIDI CCs from your ES-5. I’ve never tried whether or not this actually works; 3 INTs on one Patch however is tested and does work fine.
As mentioned above, if you set the source of an Assign to INT or WAV, and extra parameter page will be added to the Assign’s menu. There, you’ll find two extra parameters for the WAV LFO:
- Rate: The speed of the LFO (depth is defined by the Min and Max values of the Assign; and by the way the target pedal reacts to incoming MIDI CC).
You can either define a rate relative to the ES-5 Master Clock; from a full note (which equals 4 clock pulses) to a 16th note (which equals a quarter ot a clock pulse).
Or you can set an absolute rate, with non-linear values from 0 to 100:
Rate=0 – full LFO cycle takes about 16 sek;
Rate=56 – full LFO cycle takes about 1 sek;
Rate=100 – full LFO cycle takes about a quarter sek (250 ms). - Form: The waveform of the LFO. There’s SAW (upward sawtooth), TRI (triangle) and SINE. I miss a square wave here; also, downward sawtooth and sample & hold would be nice. The MIDI LFO of my Sonuus Voluum gives me all of this, and more; that’s why I never use WAV on my ES-5. Still, it’s good to have a LFO on board the ES-5. Not everybody owns a Voluum :-)
The extra menu page for the INT ramp generator has three parameters:
- Trig: This defines which source will trigger the INT ramp. Available trigger sources are basically the same as sources for Assigns in general; they include:
PAT (INT will trigger as soon as Patch is activated);
ExpL / ExpM / ExpH (INT will trigger as soon as an external expression pedal connected to your ES-5 will reach heel / middle / toe position);
all internal and external footswitches, including CNUM; and
any MIDI CC from #0 to #127, incoming on the ES-5’s MIDI receive channel (as defined in the global settings). - Tim: The time it takes INT to ramp from the Min to the Max value programmed in the Assign. Time can have values from 0 to 100. Again, those are not linear; upside is you can have both very fast and very slow ramp times, downside is that you can only find out the right time setting by experimentation. I didn’t measure thoroughly, here’s some rough values:
Tim=0 – about 0,1 s (100 ms)
Tim=30 – about 2 sek
Tim=60 – about 6 sek
Tim=90 – about 19 sek
Tim=100 – about 44 sek - Crv: The shape of the ramping curve. LNR means a linear change from Min to Max over time. SLW means the change starts slow, and becomes faster in the end. FST means the change starts fast, and becomes slower in the end.
Unfortunately, you can not make ramping up and down work with only one ES-5 footswitch. So, you cannot do stuff like “I hit MUTE to make my chorus ramp up to high speed; I hit MUTE again to make it ramp down to low speed”, nor replicate the Boss PS-5/PS-6 / Digitech Ricochet style auto-whammy effect, where holding the footswitch will ramp the pitch up, and releasing it will ramp back to regular pitch. Instead, you need two assigns to different footswitches to do this kind of stuff; one for ramp up, one for ramp down.
There is however a workaround, which I’ve used here and here: You can have ramping up and instant down on one footswitch. Create two assigns, both with the same target CC#, Min and Max values. On the first, set Src to INT, Trig to a footswitch of your choice (e.g. CNUM), Tim and Crv to taste. On the second, set Src to the same footswitch (e.g. CNUM), and Mod=MOM. Now, when you hold the footswitch, it will ramp up, and when you release it, it will instantly jump down. Only if you release it to early (before ramping up has finished), it will end ramping and not jump back.
Working with Template Patches
As you could read above, several ES-5 functions (Assigns!) can only be programmed on Patch base, not globally. Like, if you wanted your external footswitches (connected to the ES-5 CTL In) to always send specific MIDI CC commands, you would need to put this functionality in each of the 200 ES-5 Patches to make it work everywhere. Therefore my advice is: Build one, or a few, template Patches in the beginning. Then, build all your other Patches from there. You may want to use the ES-5 editor software to easily copy your template Patch(es) to all 200 Patch locations if needed.
What I would typically do in a Default Patch (check also this vid I made):
- Define my default signal chain (loop order), including input buffer and mixer settings.
- Define my default TRS switches configuration.
- Create Patch MIDIs for each of my MIDI pedals, sending the Program Change and, if required, MSB and/or LSB data of my favourite preset for that pedal.
- In case you don’t have more than 4 MIDI pedals to control from your ES-5, you could also make 2 Patch MIDIs for each one: One with your favourite preset, set to Transmit=AUTO, and one with your 2nd favourite preset, set to Transmit=MANUAL; so you can later trigger the 2nd with Assigns within the Patch.
- Important: Some pedals, like Strymons, won’t reload their current preset when they receive the Program Change command for that preset. So, typical scenario: You have a Strymon big box pedal behind your ES-5 output, bypassing it by sending CC#102=0 on some of your ES-5 Patches. Now, when you change to another Patch calling the same preset on the Strymon, it will remain in bypass. So, in this scenario, you should add CC#102=127 to the Patch MIDI sending on the Strymon’s channel.
- What I also do in my template Patches: I normally activate the loop with my M5, set the M5 to a preset programmed to be true bypass (typically Flanger or Vibrato), and set the M5 to bypass sending CC#11=0. This way, I can always quickly add the M5 if needed by kicking the On/Off footswitch on the M5.
- Define the default functionality of the external footswitches (of course, this makes only sense if you use those; if you use an expression pedal instead, define default functionality for that in your default Patches). In my case, I have 3 different basic default Patches: In one, the external footswitches will switch the Compressor and Tremolo sections of my Sonuus Voluum on/off; in the second, they will switch Groups up and down; in the third, they will toggle between 4 different volume levels via my Sonuus Voluum.
- Optionally, define what you want to do with BANK, MUTE and CNUM by default. In my case, BANK keeps its original function, but combined with Patch Select Mode 2, I can put tap tempo as secondary function on top. MUTE will be unassigned from its original function and serve as a boost instead (increasing the gain of a MIDI pedal which is normally in front of my drive). CNUM will increase mix (and sometimes repeats) of my delay/verb.
So much for now; in the upcoming article, I will collect specific tipps and tricks that I use with my ES-5.

Comments